Create a new template
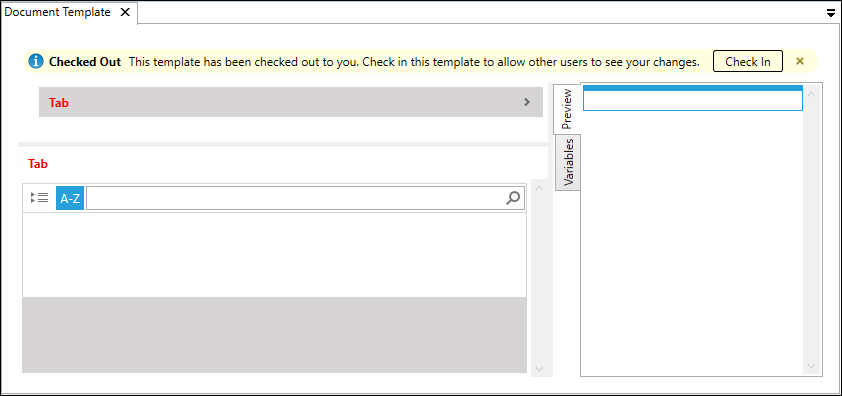
Document templates consist of content elements which are linked to variables which store user data. For information about the types and structure of these elements, see Content elements. Most elements are used to organize items in a template but some are used to create data entry fields; the latter are called variable editors (for details, see Variable Editor). The image below shows a template with four content elements: panels named Overview and Data, and two variable editors named Country and Region. Tab is always the name of the top-level element for a template.

Before you start creating a new template, you should consider the following:
- The template's structure. The order of content elements in a template is important: an element placed under another element will be shown inside it. The best way to create templates is from the top down to make sure enough higher-level elements are available to display lower-level elements you want to include.
- Any elements, even those used to enter data, can be used multiple times; for example, you can include production rates on individual product tabs and then again on a summary tab. Values entered in one place will be copied to other places automatically.
- One variable editor represents one element shown in the template, except for grids which can have several variables which are displayed in rows in the resulting tables. For example, if you want to add several images to your documents, you need to add several image variable editors to the template: one for each image you want to include.
- Access to individual template elements can be restricted so individual users or workgroups can be shown different views of the same document. For details, see Access control for template elements.
To create a new template:
- Click the New button
 in the Templates tab on the ribbon
and enter a name in the dialog. Template names can be up to 150 characters long and can contain any symbols.
 - Select the new template from the drop-down list in the Templates section on the ribbon and click Check out to make it checked out so you can edit it (see Check templates in and out).
-
New templates contain one element, the Tab. This is the top-level element under which all other elements are added; see Add content elements to templates.

The order of elements can be changed by clicking the buttons
 and
and  on the ribbon. If new elements do not automatically appear in the preview pane,
click the Refresh button
  .
. - Assign the template to a node type by clicking the Node Types button
 on the ribbon.
This determines which documents will use the template. One template can be used by several node types; for example,
you can have nodes for fields in different regions with the same data-entry fields.
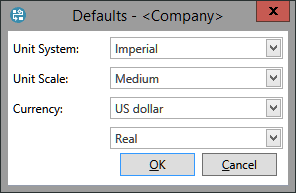
 - Specify the default settings for documents created on the basis of the new template: click the Defaults button
 on the ribbon and select the Unit System, Unit Scale, Currency and Real/Nominal option as shown below.
Changing these settings later will change existing documents based on the template.
 - In the Periodicity section of the ribbon, select periodicity settings. Five periodicities are currently available: Annually, Semi-Annually, Quarterly, Monthly and Mixed. If you select the Mixed option, the numeric fields will become active: here you can specify the number of periods of each periodicity type. The image below shows an example of the Mixed periodicity where the first two years will be shown on the monthly basis, one year on the quarterly basis, another year on the semi-annual basis; the remaining years will be shown on the annual basis.
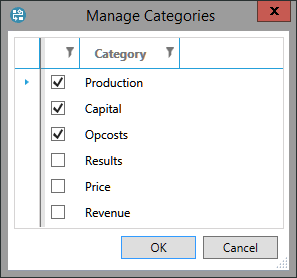
- Select variable categories which will be available in document scenarios by default; users can add more categories in individual documents. Click the Categories button
 on the ribbon to open the list of categories and check boxes next to categories you want to include. All categories are available except for General. The Production, Capital
and Opcosts categories are selected by default.
 - If required, assign the template to a workflow (see Workflows) by clicking
the Workflows button
 on the ribbon.
For details, see Associate workflows with document templates.
 - If required, assign the template to an Economics regime for economic calculations by clicking the
Economics Configuration button
 on the ribbon.
Note: The new template will be added to the list of templates but it will not be automatically opened.
Note: All changes will be saved when you click Check in. To discard the changes made, click the Discard Changes
button  on the ribbon, which also performs the check-in.
To save changes while you are editing, use the Save button in the Templates tab on the ribbon.
Note: If a node is later assigned to a different template, this will affect only new documents. Existing documents will use the originally-assigned template.

Note: Dataflow does not support numerical values with more than 15 digits (extra digits entered will be lost). You should ensure that you set the appropriate default unit system and unit scale so that numerical values remain accurate.
(Note: The list of currencies is built-in and cannot be changed; some currencies are included that are withdrawn or no longer exist -- the currency names are prefixed with 'X-' -- to allow for the handling of historical data.)
The Currency and Real/Nominal template defaults can be over-ridden by default settings for individual variables.
For version 16.5 Update 1 and later: the Unit System and Unit Scale settings can also be specified as defaults for individual variables.


